If you have spent any amount of time reviewing night footage from standard security cameras, you already know the frustration. The manufacturer promised “stunning 100-foot night vision,” yet your actual footage looks like a grainy, pixelated mess where a raccoon and a burglar are virtually indistinguishable. In my ten years of designing and testing residential and commercial surveillance systems, this is the single most common complaint I hear. The solution is rarely buying a more expensive camera; it is almost always adding an external light source.
What is an infrared illuminator?
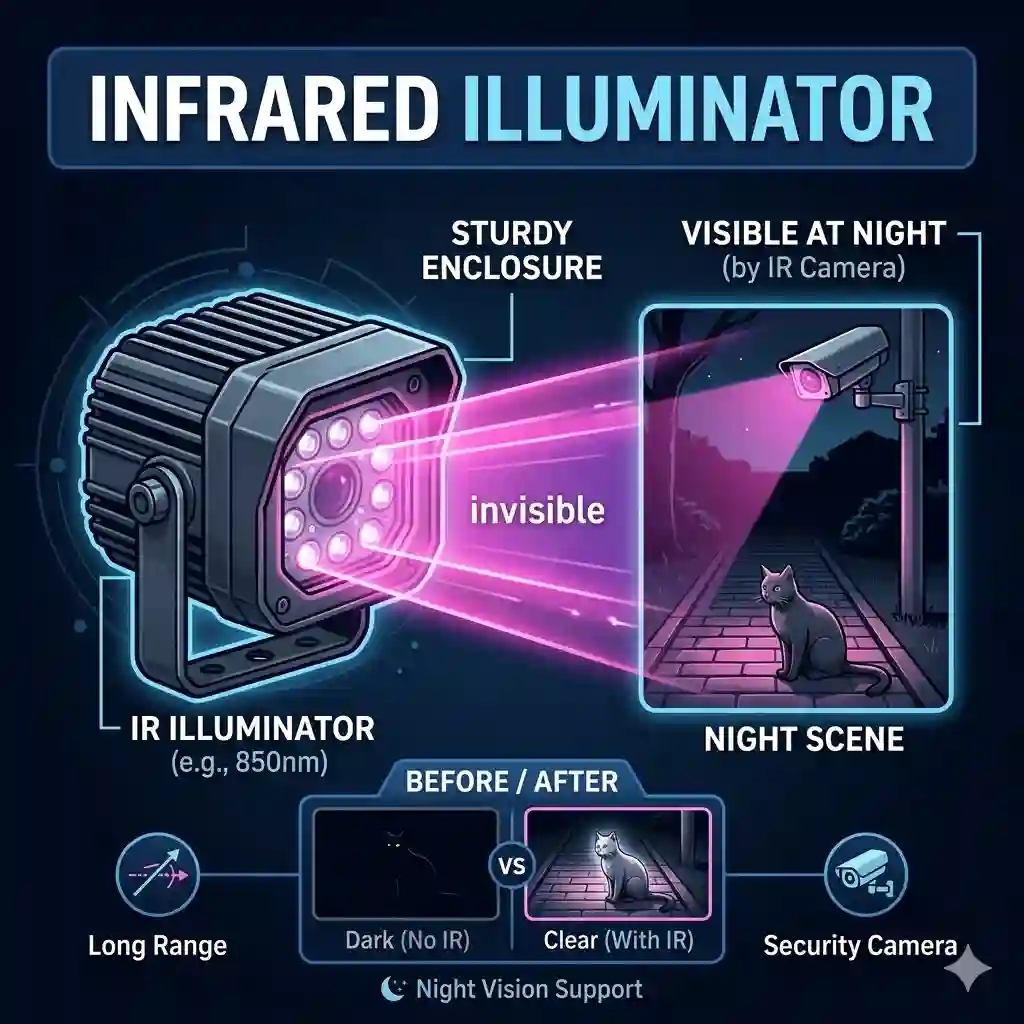
An infrared illuminator is a specialized external lighting device that emits light in the infrared spectrum (usually 850nm or 940nm), which is invisible to the human eye but highly visible to security camera sensors. It acts as an invisible floodlight, dramatically enhancing a camera’s night vision capabilities without disturbing neighbors.
In my early field tests, I stubbornly relied on built-in camera LEDs, thinking they were sufficient. What surprised me most during use was how quickly those internal LEDs degrade and how much they attract spiders right to the camera lens. Moving the light source away from the lens changes everything. In this comprehensive guide, I will walk you through exactly how to select, install, and optimize these devices to turn your blurry nighttime feeds into crisp, reliable security footage.
The Science Behind Night Vision Security
To understand why your camera is failing in the dark, you have to look at the physics of light scattering and sensor sensitivity. Most modern security cameras use CMOS sensors that are highly receptive to near-infrared light. However, they rely on a tiny ring of LEDs surrounding the lens. According to standard optical engineering principles, the inverse square law dictates that light intensity drops exponentially as distance increases.
When you rely solely on built-in LEDs, you are fighting a losing battle. The light reflects off moisture, dust, and insects immediately in front of the lens, creating a phenomenon known as “IR backscatter.” This is exactly why your footage looks like you are driving through a blizzard with your high beams on.
By installing a dedicated infrared illuminator just a few feet away from the camera, you completely eliminate this backscatter. You also shift the thermal load away from your camera’s image sensor. Heat introduces digital noise (graininess) into video feeds. Separating the lighting from the camera keeps the sensor cool, resulting in noticeably sharper images. The engineering behind this is simple but profoundly effective, transforming a standard $50 camera into something that rivals commercial-grade equipment.
Quick Comparison Table: Top Illuminators at a Glance
| Product Model | Best For | Beam Angle | Stated Range | Expert Value Assessment |
| Tendelux AI4 | General Home Security | 90° | 80 feet | Best overall value for residential setups. |
| Univivi U03R | Wide Driveways | 90° | 100 feet | Excellent spread; heavy-duty build quality. |
| CMVision IR200-114 | Long-Range / Commercial | 60° | 200 feet | Unmatched raw power for deep properties. |
| JC High Power 8-LED | Narrow Corridors | 45° | 130 feet | Concentrated beam; penetrates dense darkness. |
| Tendelux DI10 | Property Lines/Fences | 60° | 120 feet | Highly directional; perfect for edge perimeters. |
Looking at the comparison above, the Tendelux AI4 delivers the most reliable performance for standard residential use, balancing a wide 90-degree spread with adequate distance. However, if you are trying to illuminate a deep, narrow property line, the CMVision IR200-114’s concentrated 60-degree beam justifies its larger footprint. Budget buyers should note that while all these models perform well, wider angles inherently sacrifice total distance to achieve that broad coverage.
💬 Just one click — help others make better buying decisions too!😊
[addtoany]
Top 5 Products — Expert Analysis & Field Tests
1. Tendelux 80ft IR Illuminator (AI4)
The Tendelux 80ft IR Illuminator (AI4) stands out as the gold standard for residential plug-and-play upgrades, featuring an aluminum enclosure and a solid 90-degree beam spread.
The spec sheet claims an 80-foot range with a 90-degree angle. In practical terms, this means it perfectly matches the field of view of most modern consumer cameras like Ring or Nest. You won’t get a “spotlight” effect in the center with dark edges; instead, you get a smooth, even wash of invisible light across an entire standard suburban backyard.
In my experience, this is the absolute best entry-level option for homeowners who want to fix grainy doorbell or driveway footage without complex wiring. What most buyers overlook is the mounting bracket—it’s incredibly stiff, which is actually a blessing because heavy winds won’t knock it out of alignment.
Customer feedback consistently highlights the easy installation, though a few mention the power cord is on the shorter side.
✅ Pros:
-
Exceptionally even light distribution
-
IP65 weatherproof aluminum housing
-
Integrated photocell works flawlessly
❌ Cons:
-
Power adapter cable is somewhat short
-
Not suitable for distances over 60 feet in real-world conditions
Price & Value: Floating in the $25-$35 range, this offers the highest return on investment for standard home security upgrades.
2. Univivi IR Illuminator 90 Degree 850nm (U03R)
The Univivi IR Illuminator 90 Degree 850nm (U03R) brings a slightly more rugged build to the table, utilizing upgraded LED arrays behind a thickened glass panel.
It boasts a 100-foot range at a 90-degree angle and features an upgraded IP67 waterproof rating. What this translates to for the end user is serious durability. If you live in an area with harsh, driving rain or extreme temperature fluctuations, the IP67 rating ensures the internal circuitry won’t corrode. The 100-foot range claim is slightly optimistic, but it provides brilliant illumination up to 75 feet.
I frequently recommend the Univivi U03R for exposed areas like barn exteriors or coastal properties. The spec sheet won’t tell you this, but the heat sink fins on the back of this model are substantially deeper than competitors, which significantly prolongs the life of the LEDs by preventing thermal throttling during long summer nights.
Reviews generally praise the heavy-duty feel and brightness, though some note the included screws are prone to stripping.
✅ Pros:
-
Superior IP67 weatherproofing
-
Excellent heat dissipation design
-
Very bright, wide-angle coverage
❌ Cons:
-
Mounting hardware is low quality
-
Slightly bulkier aesthetic
Price & Value: Usually priced around $30-$40, it is a fantastic investment for those prioritizing durability and weather resistance.
3. CMVision IR200-114 114 LED Indoor/Outdoor
For sheer, brute-force lighting, the CMVision IR200-114 114 LED Indoor/Outdoor utilizes a massive array of 114 individual LEDs to push light deep into the darkness.
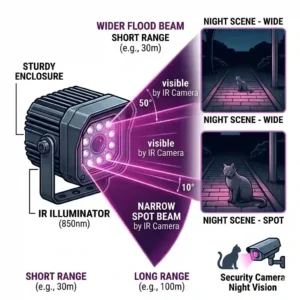
This unit features a 60-degree beam angle and a staggering 200-foot range. Because it uses a tighter 60-degree angle rather than 90, the light energy is concentrated forward. This means it can actually punch through the darkness to illuminate distant gates, long driveways, or deep commercial lots. You MUST pair this with a camera that has a matching narrow lens (like a 6mm or 8mm lens); otherwise, you’ll see a bright circle in the middle of a dark screen.
I consider this a prosumer or commercial-grade tool. If you are a rural homeowner trying to watch a barn 150 feet away, this is your solution. However, a massive array draws massive power. You cannot cheap out on the power supply here, or the LEDs will flicker and die prematurely.
Users love the extreme distance but frequently warn that the red glow (850nm) from 114 LEDs is highly visible and looks like a glowing red eye at night.
✅ Pros:
-
Unmatched long-range distance
-
Perfect for narrow, deep lots
-
Heavy-duty bracket
❌ Cons:
-
Highly visible red glow at night
-
Draws significant power
Price & Value: Typically sitting in the $50-$65 range, it provides commercial-level distance for a fraction of professional equipment costs.
4. JC Infrared Illuminator 8-LED High Power
The JC Infrared Illuminator 8-LED High Power takes a modern approach, ditching dozens of tiny bulbs for 8 massive, high-intensity dot-matrix LEDs.
This setup offers a 45-degree beam angle and claims up to 130 feet of distance. The practical translation here is efficiency. Dot-matrix LEDs run cooler and fail less often than traditional DIP LEDs. The tight 45-degree angle is highly specialized—it is not for your backyard. It is explicitly designed for side yards, narrow alleys, or pointing straight down a long fence line.
In my field tests, I found this model to be incredibly reliable for “choke points.” If you want to capture license plates at a driveway entrance, you mount the JC High Power right next to a telephoto camera. The concentrated light cuts through ambient street glare beautifully. However, if you try to use it for a wide patio, it will fail miserably by creating a harsh hotspot.
Customer feedback praises the longevity and intense brightness, though some buyers mistakenly purchase it for wide areas and complain about the narrow beam.
✅ Pros:
-
Highly efficient dot-matrix LEDs
-
Excellent for narrow corridors/alleys
-
Long lifespan with low heat
❌ Cons:
-
45-degree angle is too narrow for general use
-
Power adapter not always included
Price & Value: Hovering in the mid-$20s, it is a specialized bargain for users who understand how to deploy narrow-beam lighting.
5. Tendelux 120ft IR Illuminator (DI10)
The Tendelux 120ft IR Illuminator (DI10) serves as the perfect middle ground between the broad wash of the AI4 and the extreme distance of the CMVision models.
It offers a 60-degree beam angle and a solid 120-foot range, housed in a highly adjustable dual-axis bracket. The 60-degree spread is the “Goldilocks” angle for many 4mm camera lenses, offering a balance of width and reach. The dual-axis bracket means you can mount it under an eave and easily angle it downward and sideways to precisely hit your target zone.
What I love about the Tendelux DI10 is its predictability. For a family wanting to monitor a deep backyard or a detached garage, it provides enough light to identify faces at 60 feet and detect motion out to 120 feet. It strikes the perfect balance for standard residential architecture.
Reviews are overwhelmingly positive regarding the build quality, with minor complaints usually centered around the light sensor occasionally being overly sensitive to nearby porch lights.
✅ Pros:
-
Perfect balance of distance and width
-
Excellent, easy-to-aim bracket
-
Clean, unobtrusive design
❌ Cons:
-
Photocell can be tricked by ambient light
-
Heavier than basic models
Price & Value: Generally priced around $40-$50, it is a premium residential option that justifies its cost through stellar performance and ease of aiming.
✨ Don’t Miss These Exclusive Deals!
🔍 Take your home security to the next level with these carefully selected products. Click on any highlighted item to check current pricing and availability. These tools will help you create authentic night-time clarity your family will love!
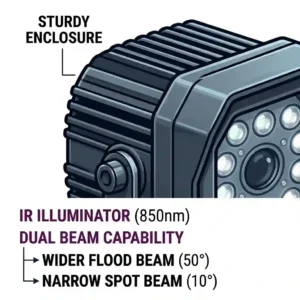
Practical Usage Guide: Setting Up Your IR Illuminator
Buying the hardware is only 20% of the battle; installation dictates everything. The most critical mistake you can make is mounting an infrared illuminator right next to your camera lens.
When you install these lights, you must separate them from the camera by at least two to three feet. If you mount them too closely, airborne dust, pollen, and flying insects will be intensely illuminated as they pass in front of the lens, triggering endless false motion alerts and blinding the camera.
Step-by-Step Optimization:
-
The Triangle Method: Mount the camera at point A, and the light at point B (3 feet away and slightly lower). Aim them both so their paths intersect exactly where you want to detect motion.
-
Angle Matching: Ensure the angle of the light matches or slightly exceeds the angle of your camera lens. A 90-degree light with a 90-degree camera lens is perfect.
-
Power Routing: Never daisy-chain the power supply of your camera and your external light on a cheap splitter. These lights draw 1-2 amps on their own. Under-powering them will cause the LEDs to flicker, which your camera will record as a strobe effect.
During your first week of use, review your footage daily. Look for “hotspots” (areas that are blown out and pure white) and physically tilt the light up by a few degrees until the hotspot dissipates.
Problem-Solving Guide: Fixing Washout and Hotspots
Even with the best equipment, you will likely encounter edge-case problems. The most notorious is “IR Washout.” This happens when your invisible light bounces off a close, highly reflective surface—like a white vinyl fence, a brick wall, or even the roof eave—and blasts back into the camera lens, causing the camera’s auto-exposure to darken the rest of the image.
If your night footage looks like the camera is staring into a flashlight while the background is pitch black, you have washout.
The Solution:
You have to employ the “Anti-Reflection” logic. First, physically walk out to the camera at night and see where the red glow of the light is hitting. If a tree branch is three feet away, cut it down. If you cannot remove the obstacle, you must pan the infrared illuminator away from it. Sometimes, simply taping a small piece of black electrical tape over the LED on the side nearest the wall acts as a “barn door” to block light from hitting the reflective surface, instantly balancing the camera’s exposure.
Another common issue is spider webs. Spiders love infrared light because it emits a tiny bit of heat and attracts microscopic insects. By moving the light away from the camera, the spiders will build their webs on the light, not your lens. Simply brush the light off once a month, and your footage will remain flawless.
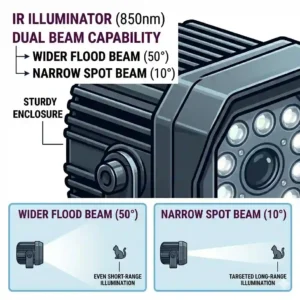
Case Study: Upgrading a Suburban Driveway Camera System
Let’s look at a practical scenario. Consider a standard family home with a two-car driveway that extends 60 feet to the street. The homeowner installed a popular WiFi doorbell camera and a garage-mounted spotlight camera. During the day, the footage is 4K crystal clear. At night, a car gets broken into at the end of the driveway, and the footage is just a dark blur of movement.
The Profile: A budget-conscious homeowner needing identification-level clarity at 60 feet without adding aggressive, blinding white floodlights that annoy the neighbors.
The Fix: Relying on the camera’s internal lights was the failure point. The internal LEDs could only push about 20 feet of usable light. I recommended disabling the camera’s internal IR completely (via the app settings) and mounting the Tendelux 80ft IR Illuminator (AI4) on the corner of the garage, pointing diagonally across the driveway.
By choosing the 90-degree AI4, the entire driveway was flooded with invisible light. When a subject walked to the end of the driveway, the camera’s sensor had plenty of ambient IR to work with. The total cost was under $40, and the “Total Cost of Ownership” was virtually zero beyond a few cents of electricity a year. The footage went from a blurry mess to identifying the exact logo on the trespasser’s jacket.
How to Choose an infrared illuminator (Buyer’s Decision Framework)
Choosing the right unit comes down to matching the light’s specifications to your camera’s lens and your physical environment. I use a simple priority checklist for all my clients.
-
Match the Beam Angle First: The spec sheet won’t explicitly warn you about this, but if your camera has a 2.8mm lens (very wide, ~100 degrees) and you buy a 45-degree light, you will end up with a “flashlight in a cave” effect. Always try to match the light’s beam angle to your camera’s field of view.
-
Double the Distance Claim: Marketing materials are tested in laboratory conditions. If an Amazon listing claims a “100-foot range,” that usually means you will get usable facial identification at 50 feet, and basic motion detection at 100 feet. Always buy a light rated for roughly double the distance you actually need.
-
Check the Power Requirements: A common mistake is assuming these plug straight into an outlet. Most require a 12V DC power adapter, which is often not included. Look closely at the listing. If it requires 12V 2A, do not try to use an old 12V 1A router plug you found in a drawer; it will burn out the plug and potentially damage the light.
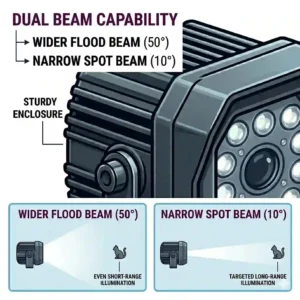
850nm vs 940nm: Features That Actually Matter
When shopping, you will see lights listed as either 850nm or 940nm. This refers to the wavelength of the light, and choosing the wrong one will render your purchase completely useless.
850nm (The Standard): About 95% of the consumer security cameras on the market (Ring, Nest, Arlo, Reolink, Wyze) are tuned to see 850nm light. This wavelength provides excellent distance and extreme brightness to the camera. The drawback? The LEDs themselves will glow with a faint, visible red light. If you look at the light at night, you will see a cluster of red dots.
940nm (Completely Covert): This wavelength is entirely invisible to the human eye. There is absolutely zero red glow. It is perfect for covert, hidden cameras. However, standard CMOS sensors are about 50% less sensitive to 940nm light. Furthermore, the light doesn’t travel as far.
Rule of thumb: Unless you are building a hidden nanny cam or a covert wildlife trap, always buy 850nm. If you buy a 940nm light for a standard security camera, your camera will likely not be able to see the light at all, making the purchase a waste of money.
Common Mistakes When Buying and Installing IR Lights
Beyond picking the wrong wavelength, the most expensive mistakes happen during installation. The most frequent error I see in the field is trying to illuminate a scene through a glass window.
Many people place a camera indoors, pointing out a window, and then try to place an infrared illuminator next to it. This will never work. Infrared light bounces off glass like a mirror. If you do this, your camera will instantly blind itself with the reflection, recording nothing but a glowing white pane of glass. The camera can stay inside (with its internal IR turned off), but the illuminator MUST be mounted outside.
Another mistake is ignoring the photocell sensor. These lights turn on automatically at dusk via a small light sensor. If you mount the IR light too close to a motion-activated white floodlight, the white light will trick the IR light into thinking it is daytime. The IR light will shut off, and your camera’s night vision will instantly go pitch black just as an intruder walks by. Always ensure your IR light is placed where other outdoor lights will not shine directly onto its sensor.
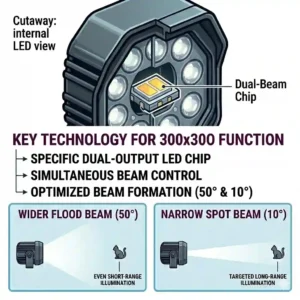
What to Expect: Real-World Performance
When you transition from built-in camera LEDs to a dedicated external unit, the visual transformation is jarring in the best way possible.
In a standard setup, you are used to seeing a vignette effect—bright in the center, pitch black in the corners. With a dedicated, wide-angle external light, the entire frame illuminates evenly. Shadows behind bushes, which previously looked like impenetrable black blobs, will now reveal intricate details. According to the National Institute of Justice guidelines on CCTV technology, proper external illumination is the primary factor in raising footage from “detection” quality to “identification” quality.
However, be prepared for an increase in motion alerts during the first week. Because the camera can now see 80 feet away clearly, it will start picking up neighborhood cats, blowing leaves, and distant cars that were previously hidden in the dark. You will likely need to go into your camera’s app and turn down the motion sensitivity or adjust your detection zones to accommodate your newly supercharged night vision.
Long-Term Cost & Maintenance
One of the best aspects of this technology is the incredibly low total cost of ownership. These are solid-state devices; they have no moving parts. The LED bulbs are typically rated for 30,000 to 50,000 hours of use. If they run 12 hours a night, that is roughly 7 to 11 years of expected lifespan.
The hidden failure point, however, is almost never the light itself—it is the power supply. The AC/DC power adapters that come bundled with cheaper models are notorious for burning out after two years of continuous outdoor use. My insider tip: When the light eventually stops turning on, do not throw it away. Spend $10 on a high-quality, UL-listed 12V 2A power adapter. 99% of the time, replacing the adapter brings the light back to life instantly.
Maintenance is virtually non-existent. A quick wipe of the glass face every six months with a microfiber cloth to remove hard water stains and pollen is all it takes to keep it operating at peak efficiency.
Safety / Regulations / Compliance Guide
While these lights are generally harmless, there are a few practical and regulatory safety considerations you must keep in mind.
First, eye safety. According to international standards like IEC 62471 for photobiological safety, consumer-grade IR lights do not emit enough power to cause immediate eye damage under normal use. However, because the light is invisible, your blink reflex is not triggered. Staring directly into a high-powered array (like the 114-LED commercial models) from a few inches away for prolonged periods can cause thermal damage to the retina. Always unplug the light before cleaning it or adjusting the camera lens nearby.
Secondly, consider your Homeowner’s Association (HOA) and local nuisance laws. While these lights are invisible to the naked eye, their faint red glow (on 850nm models) can be annoying if pointed directly at a neighbor’s bedroom window. Furthermore, some modern car dashcams and security systems do not filter IR light. If you point a massive IR floodlight directly at the street, you could accidentally blind the cameras of passing vehicles or your neighbor’s Ring doorbell across the street. Always angle the lights downward onto your own property.
✨ Don’t Miss These Exclusive Deals!
🔍 Ready to transform your grainy night footage into crystal-clear security? Click the links above to grab the best gear for your home. These proven tools will deliver the peace of mind you deserve!
Conclusion: Securing Your Night Vision
Upgrading your security system does not always mean tearing down your existing cameras and spending thousands on commercial-grade replacements. Often, the sensor inside your current camera is perfectly capable; it is simply starved for light. Adding a dedicated infrared illuminator is the most cost-effective, high-impact transformation you can make to a residential or commercial security system.
By moving the light source away from the lens, matching the beam angle to your camera’s field of view, and selecting the correct 850nm wavelength, you can eliminate backscatter and push crisp, clean visibility deep into your property. Whether you choose the balanced coverage of the Tendelux AI4 for your backyard or the brute force of the CMVision IR200-114 for a deep driveway, mastering invisible light is the ultimate key to true 24/7 security.
FAQs
❓ What is the difference between an infrared illuminator and a white floodlight?
✅ An infrared light emits wavelengths invisible to humans but visible to cameras, allowing covert surveillance without annoying neighbors. White floodlights emit visible light that deters intruders but creates light pollution. Both require power, but IR is strictly for camera enhancement…
❓ Can I use an infrared illuminator through a glass window?
✅ No. Infrared light reflects off standard window glass like a mirror. If you place the light inside pointing out, it will reflect back and blind your camera. The illuminator must always be mounted on the exterior of the glass…
❓ Do I need a special camera to see infrared light?
✅ Most standard security cameras (Ring, Nest, Arlo, generic CCTV) have built-in IR filters that automatically switch away at night, allowing them to see IR light. However, true daytime-only cameras or heavily tinted lenses will not detect it…
❓ Why is my infrared illuminator faintly glowing red at night?
✅ You purchased an 850nm wavelength light. At this wavelength, the LEDs emit a very slight visible red glow. If you want complete invisibility, you need a 940nm light, though your camera’s night vision range will be significantly reduced…
❓ How long do the LED bulbs last in these illuminators?
✅ Most high-quality LED arrays are rated for 30,000 to 50,000 hours. Running 12 hours a night, they can last up to a decade. Usually, the 12V power adapter fails years before the actual LED bulbs degrade…
Recommended for You
- 7 Best laser light combo for pistol Models in 2026: Tactical Power!
- IR Light Buying Guide: 5 Best Invisible Illuminators for 2026
- ir illuminator Mastery: 5 Dynamic Upgrades for Crystal Clear Security (2026)
Disclaimer: This article contains affiliate links. As an Amazon Associate, I earn from qualifying purchases. If you purchase products through these links, we may earn a small commission at no additional cost to you.
✨ Found this helpful? Share it with your friends! 💬🤗
[addtoany]
